wheel change
You need to change your wheels.
Here's what I do for the rear wheel.
It's pretty much the same for the front, only with the rear wheel, the brake and chain are more in the way.
(tire is Michelin Pilot Road)
Step 1
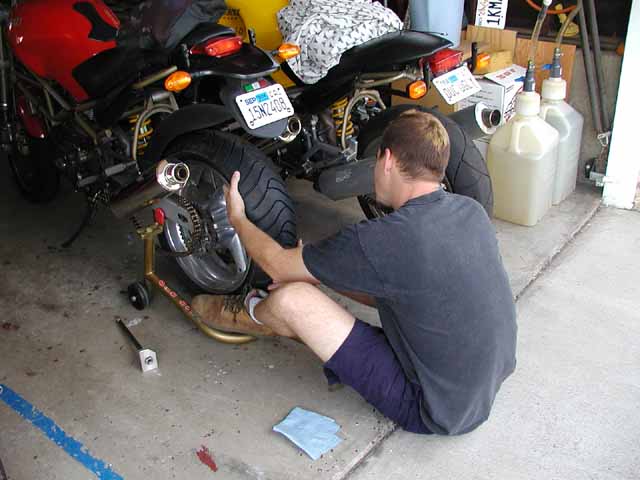
Support the wheel
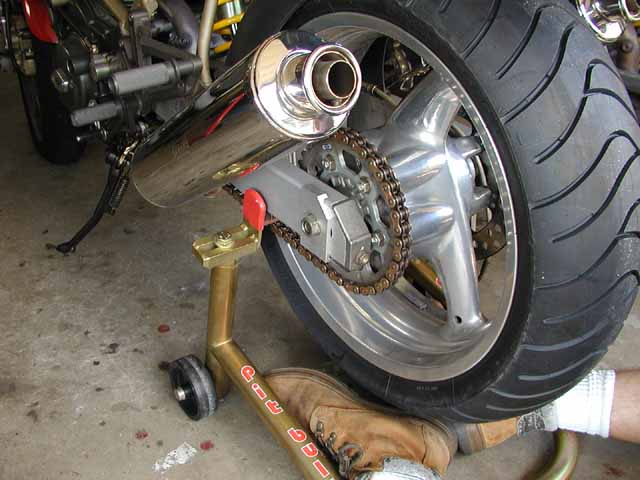
Support the wheel
I sit behind the bike and put my feet under the wheel to support it.
After removing one of the nuts, the axle will slide out the easiest if you can supprt the weight of the wheel on your feet.
Don't press up too hard, or it's the same as not supporting it at all.
Step 2
Remove axle and push wheel forward
Remove axle and push wheel forward
After the nut is loosened, you can tap on the exposed end of the axle to get it moving.
After this, you can pull the axle out by hand.
Resist the urge to use a hammer and a drift unless the axle is absolutely stuck.
Then, take effort not to wedge a tapered drift into the hollow end of the axle.
Also, if hammering, try not to bung things up by deforming the end of the axle, the chain adjuster, the slwingarm, or the brake caliper bracket.
Step 3
Set chain aside
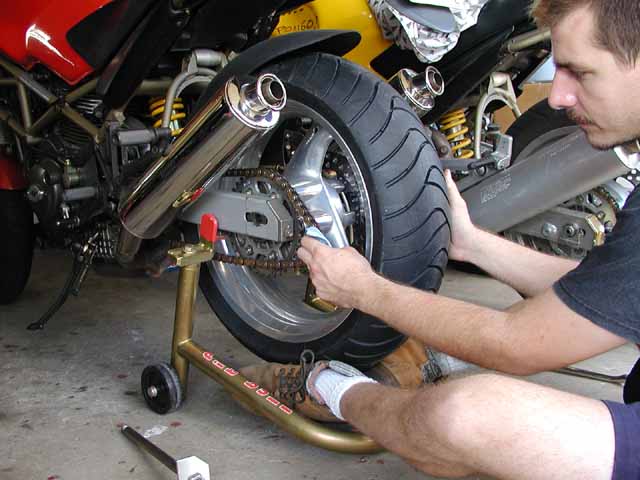
Set chain aside
You should be able to lift the chain off the sprocket and set it to the side.
I generally rest it on the end of the swingarm.
Step 4
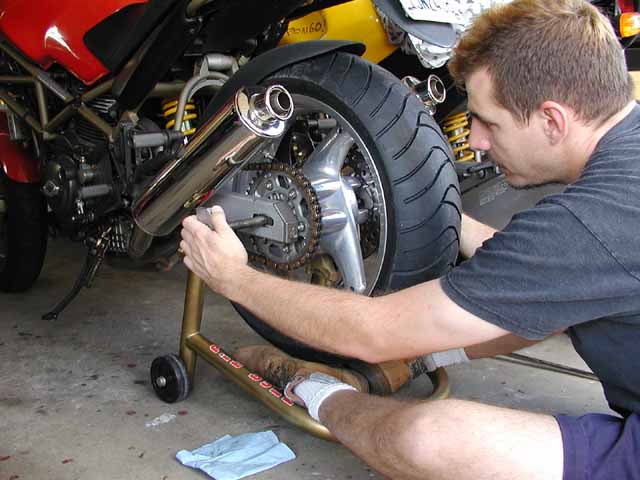
Remove brake system
Remove brake system
Here, you move the caliper off the brake disc and then disengage the bracket from the locating tab.
Then set the brake system out of the way of the wheel.
Step 5
Pull out the wheel
Pull out the wheel
Lift and pull out the wheel.
There should be no obstructions other than possibly working the wheel out from under the fender (or mudguard).
Assembly
Step 6
Assembly
Installing the wheel is mostly the reverse order of removing it.
The above pics were actually taken while installing the rear wheel of Zina's M900ie.
Step 7
Place rear wheel into position, pushing it forward and resting it on your feet.
Oh, and there's a "cone shaped" spacer on SSs and Monsters.
The "flat" part of the cone goes out to the left.
It rests against the swingarm.
Step 8
Reinstall rear brake system.
Ensure the brake pads are spread.
Engage the caliper bracket onto the locating pin and then place the caliper on the rear rotor.
Step 9
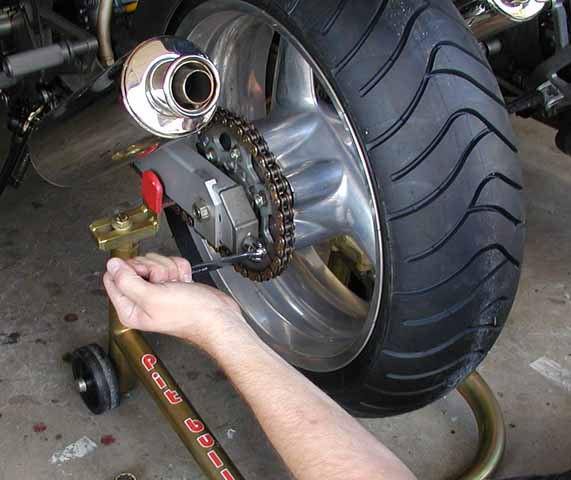
Set chain onto the rear sprocket.
Step 10
Push chain adjusters into place and reinstall axle.
You may need to move the caliper bracket so the axle will go through it.
Also, if your bike has the cheesy gold steel alignment plates, completely degrease them, the axle nuts, and the swingarm.
Now, apply fresh grease to the outside of the plates.
This helps them to not rotate when torquing the axle.
Step 11
Push forward on the wheel and torque the axle nut(s).
Chain alignment and tension adjustment follow. For tension, you want at least an inch of free play from top to bottom when pushing up on the chain and pulling down on it.
Step 12
Place straight edge on rear sprocket to check chain alignment.
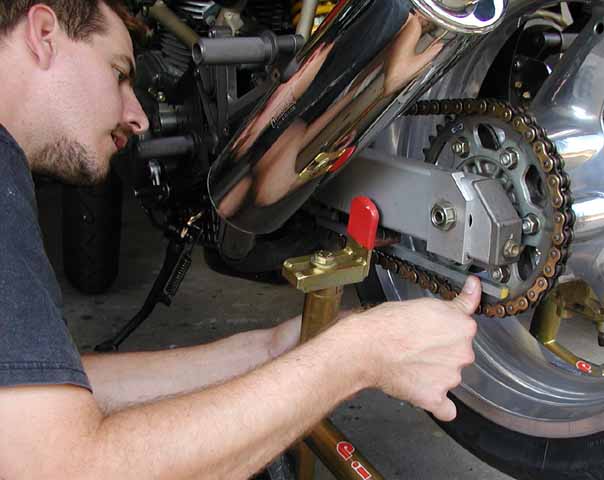
Place straight edge on rear sprocket to check chain alignment.
Ensure that the straight edge is absolutely flat on the sprocket.
You do not want a false reading due to excess lube buildup or because the bar is resting against a sprocket nut.
Step 13
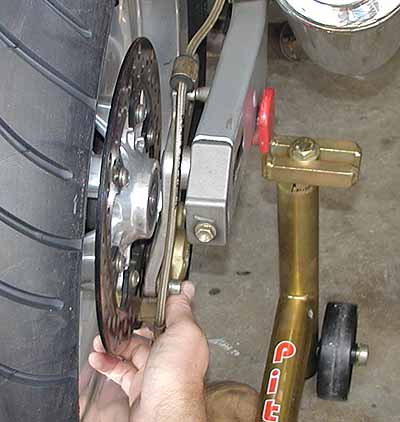
Look at front of straight edge.
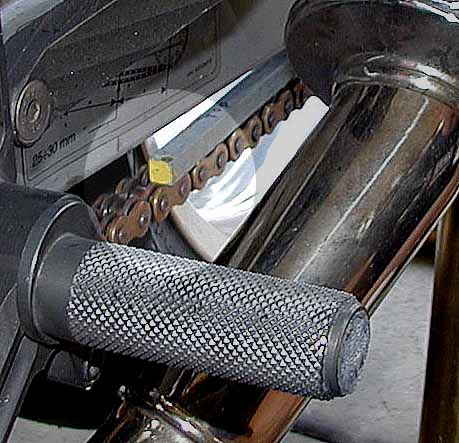
Look at front of straight edge.
Notice the highlight.
The straight edge is resting directly above the inner side plate.
This is exactly the same "plane" the edge is resting against at the rear sprocket.
If the straight edge is inboard of this location, pointing to the void in the middle of the chain, you need to readjust the chain by loosening the axle nut and playing with the chain adjuster screws.
Same if the edge is aligned to the outer sideplate.
Whenever adjusting the alignment screws, be sure to push forward on the rear tire to seat everything in the chain adjustment system.
This method of chain alignment ensures that the sprocket is in line with the chain line.
This does not ensure that the rear wheel is pointing straight forward!!!
Those are two different concepts.
But, if the motorcycle was designed properly, then the chain line is parallel to the centerline of the cycle, and then chain line and wheel line will be similar!
Step 14
Tighten adjusters.
Tighten adjusters.
Once completed and everything is done, tighten down on these screws!
Many times, shops not familiar with Ducatis will not tighten these.
The result is that the screw comes loose and the end plate will loosen from the swingarm and get sucked into the rear sprocket or the rear brake rotor.
I did this to Zina's 900CR and my own Pongo has evidence of it happening in the past, too!