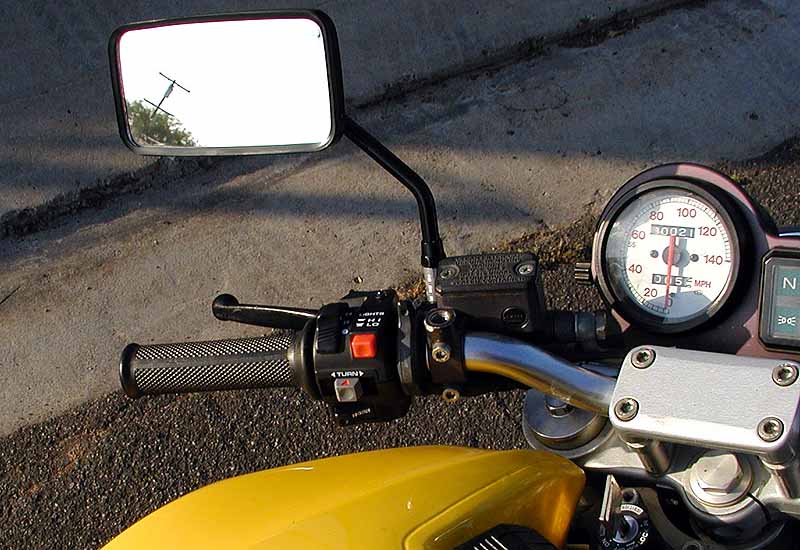
Pongo, my salvaged 1997 M900, came with a broken left handlebar switch. The horn button was fatally smashed in.
This is unacceptable in an urban environment, where a short toot of the horn occasionally wards off murderously inattentive, cell phone talking
car operators. "Drivers" is too kind a compliment to these mindless drones. Anyhow, I happened upon the below shown switch
groups in the catalog of an aftermarket parts vendor.
Click any image on this page for a larger version.
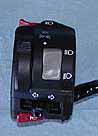
"Street" switch and "Dual Sport" switch
 . . . . . . . . .
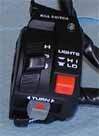
Notice that the Dual Sport switch group is nearly identical to the OEM switch groups found on Monsters and Superbikes!
The problem is that some solder work needs to be performed to transform the kill switch lever into a high beam flasher.
To do this, open up the switch group using a Phillips head screwdriver.
There are a couple layers of pieces to take apart.
Use a soldering iron to remove the blue/white wire and then remove it from the switch group.
Next, remove the extra black wire that goes from the horn to the flasher switch.
Now, be sure to verify the high beam connections with an ohmmeter and playing with the high beam switch.
Now, use the soldering iron to add two pieces of wire to the two contacts for the high beam switch and route them to the flasher switch and solder the other ends of these wires.
If you have ever soldered anything before, this is not a difficult task.
The dual sport switch also features a "Bling" blue LED that I rewired to be on with the headlights, rather than just the high beam.
The "Street" switch is 4mm wider than the "dual sport" switch.
An advantage of these aftermarket switches is that should you again damage it, the next replacement switch group should be a simple install.
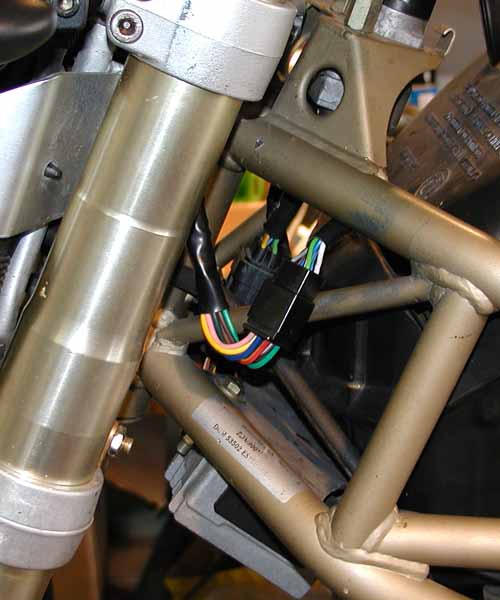
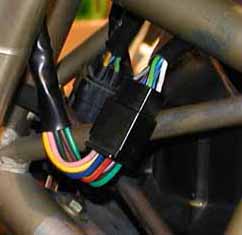 Shown to the right are the connectors on the Ducati Monster.
After the picture was taken, the wires and "new" connector are tucked in behind the frame rail.
The OEM connector is in the background and the supplied connector in the foreground.
The aftermarket switch installs in an unobtrusive manner.
Shown to the right are the connectors on the Ducati Monster.
After the picture was taken, the wires and "new" connector are tucked in behind the frame rail.
The OEM connector is in the background and the supplied connector in the foreground.
The aftermarket switch installs in an unobtrusive manner.
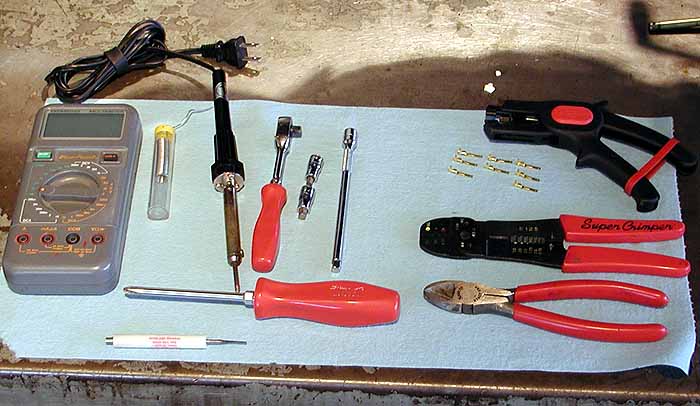
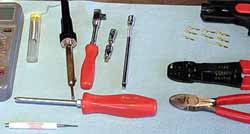 A listing of the tools I used for the install of the "dual sport" switch:
soldering iron and solder (dual sport only)
multi-meter
wire strippers
crimping / stripping tool
wire cutters
phillips screwdriver
4mm and 5mm hex sockets and ratchet
modified screwdriver used to push out connector pins
If you are not familiar with electric wiring, please be sure to have a professional motorcycle repair technician perform the installation of this switch.
These are offered at www.ca-cycleworks.com for $55.
Look under Catalog -> Ducati -> electrical.
Click to download install instructions: switch.pdf.