The Ducati factory manual is quite useful for the four valvers, unlike the manual for the two valve Ducatis.
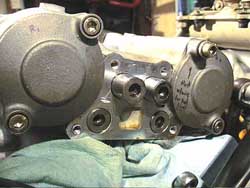
 The valve adjustment on the 4V motor seems easier than on the 2V in a way. Everything just seems to unbolt very easily and things just fall off the bike. Very easy to work on. While at first, things may seem cramped as compared to the 2V heads, it isn't so. It's easy to take the cams out, it's easy to pry the closing rocker arms... everyhting's pretty easy.
I rediscovered some coolio feeler gauges that make taking the measurements on the 4V downright easy. Pictured to the right, these tools were designed and made for OHC engines with small covers for adjusting valve lash on threaded locknut rockers.
Procedure
- Remove side fairings, tail section, gas tank, air box, and chin fairing
- Remove all the electrical goodies hangin off the right side and the belt covers. (Good time to inspect those yellow alternator wires!)
- Drain the coolant and remove the radiator. Bungee tie the oil cooler back and away from the front head. "Real" machanics say pulling the radiator isn't necessary. Sure, but you won't find any dings in my or my customers' radiators. Sorry, I'm just anal...
- Disconnect the throttle cable and the electrical connections to the FI and remove the throttle bodies (complete) from the bike
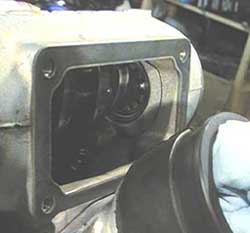
- Remove the valve covers and take valve clearance readings for both cylinders, each at TDC
- Now, pull off the belts, and the covers on each side of the head, leaving the cam holding covers in place
- On the right side of the engine, pull out the opening rocker shafts ~1/2 inch until the opener moves out of the way of the cam
- Remove the screws to the cam holders and work the cams out
- Inspect the rocker arms for wear. This may be considered optional... especially since removal of the cam isn't required if adjustment of the valve isn't necessary
- Remove the old shims from your bike. Put the cylinder you're working on at TDC and use forceps wrapped with electrical tape to hold the valve in place. (Affix them at the bottom, just above the valve guide seal) The hale rings can be real buggers to get out and you may have to tap on it with a hammer and a drift. When you're done with a valve and you've removed the closing shim, use safety wire to hold it in place. Run the safety wire to a valve cover screw.
- Adjust your valves down to the lower end of the specs by swapping for ones the right size. Follow my links to the 2V adjustment page (here) for the math on calculating shim sizes.
More pictures to follow... we're working on a video and will have some screen captures from that.